Configure AI Actions
AI Actions are available in Cohesivo. To use this feature you must first configure the built-in service connectors.
Once the framework is configured, before you can start using AI Actions, you can configure access to Ibexa-made service connectors by following the instructions below.
Once the connectors are configured, you can start working with the AI Actions feature.
Taxonomy suggestions
The default OpenAI or the optional Google Gemini connectors can used by the Taxonomy suggestions feature to generate embeddings for suggesting tags and product categories. After you configure the OpenAI connector, or set up the optional Google Gemini connector and modify the default taxonomy suggestions settings, you can create AI actions that use the Text to Taxonomy action type.
Configure access to OpenAI
To use the built-in connector with the OpenAI service, you need to create an OpenAI account, get an API key, and make sure that you set up a billing method.
Provide the API key in your instance's OpenAI connector settings.
Sample OpenAI action configurations
The AI actions come with sample AI action configurations to quickly get you started on using the feature.
Based on these examples, which reflect the most common use cases, you can learn to configure your own AI actions with greater ease.
Configure Anthropic connector
The Anthropic connector adds basic handlers that let you refine text or generate alternative text for images.
To use the connector with the Anthropic services, you need to create an account, make sure that you set up a billing method, and get an API key.
-
Log in to your Anthropic Claude console.
-
Go to API keys and click Create Key.
-
Select the workspace, enter a Key Name and click Add.
-
Take a note of the API key, because it is displayed only once.
Provide the API key in your instance's Anthropic connector settings.
By default, when reaching out for responses, the Anthropic connector uses the Claude Sonnet 4 model.
Users can override this setting at runtime when they edit or create an AI action.
You can also change the default values globally.
To do it, in config/packages folder, create a YAML file similar to this example:
1 2 3 4 5 6 7 8 9 10 | |
You can now use the Anthropic connector in your project.
Current model availability
Anthropic regularly releases new models and deprecates older ones. Before you configure the connector, check the Anthropic models overview for the current list of supported model identifiers.
Configure Google Gemini connector
The Google Gemini connector adds basic handlers that let you refine text or generate alternative text for images.
Get API key
To use the connector with the Gemini services, you need to create an account, set up billing, enable Gemini API and get an API key.
Create the Google Cloud project
- Sign in to the Google Cloud Console.
- In the top bar, click Default Gemini Project to open a project picker.
- Click New project and provide project details:
- Add project name, for example, "My project".
- Modify the automatically generated Project ID if necessary.
- Select location: choose your organization.
- Click Create.
Configure billing
- Navigate to the Google Cloud Console's Billing page.
- If you do not have one, click Add billing account and add a payment method.
- In Your projects tab, locate your project, and in its line, from the Actions menu, select Change billing.
- Select your active billing account, and click Set account.
Enable the Gemini API
- Navigate to the Google Cloud Console's APIs & Services page.
- From the left-hand menu, select Library and search for the Generative Language API.
- In the API's details page, click Enable.
Generate the API key
- Go to Google AI Studio's API keys page, and click Create API key.
- Provide a name for the API key, select "My project" from a list of projects and click Create key.
- Back in the API keys list, in your project's line, copy the API key.
Set API key in configuration
Provide the API key in your instance's Google Gemini connector settings.
Different API keys for different SiteAccesses
If there are multiple SiteAccesses in your installation, you can set different API keys for each SiteAccess.
To do it, set the keys under the ibexa.system.<scope> configuration key, like so:
1 2 3 4 5 6 7 | |
Configure default models
By default, when reaching out for responses, the Gemini connector uses the Gemini Pro model for text refinement and Gemini Flash model for alternative text generation.
Users can override this setting at runtime when they edit or create an AI action.
You can also change the default values globally.
To do it, in config/packages folder, create a YAML file similar to this example:
1 2 3 4 5 6 7 8 9 10 11 12 13 14 15 16 17 18 19 20 | |
When setting up models, make sure that you follow these rules:
default_modelmust reference a configured modeldefault_max_tokensmust not exceed the model’s limit- If you use the same model for different action types, settings must be consistent
Google Gemini and taxonomy suggestions
To use Google Gemini for generating taxonomy suggestions, ensure that you change the embeddings provider and model setting accordingly.
You can now use the Gemini connector in your project.
Configure access to Ibexa Connect
First, get the credentials by contacting Ibexa Support.
Create team
In Ibexa Connect, set up the account, and create a team. Navigate to the team details page and note down the numerical value of the Team id variable.
Creating a team matters, because scenarios that process data coming from your AI action are associated with a team. This way, if your organization has more than one Cohesivo project, each project can be linked to a different team and so can be scenarios used in those projects.
If specific users from the team are supposed to modify scenario settings, you must assign the right roles to them.
Create token
Navigate to your Ibexa Connect user's profile, and on the API ACCESS tab, create a new token. Select the following scopes to set permissions needed to enable the integration of platforms:
custom-property-structures:readcustom-property-structures:writehooks:readhooks:writescenarios:readscenarios:writeteam-variables:readteam-variables:writeteams:writetemplates:readtemplates:writeudts:readudts:write
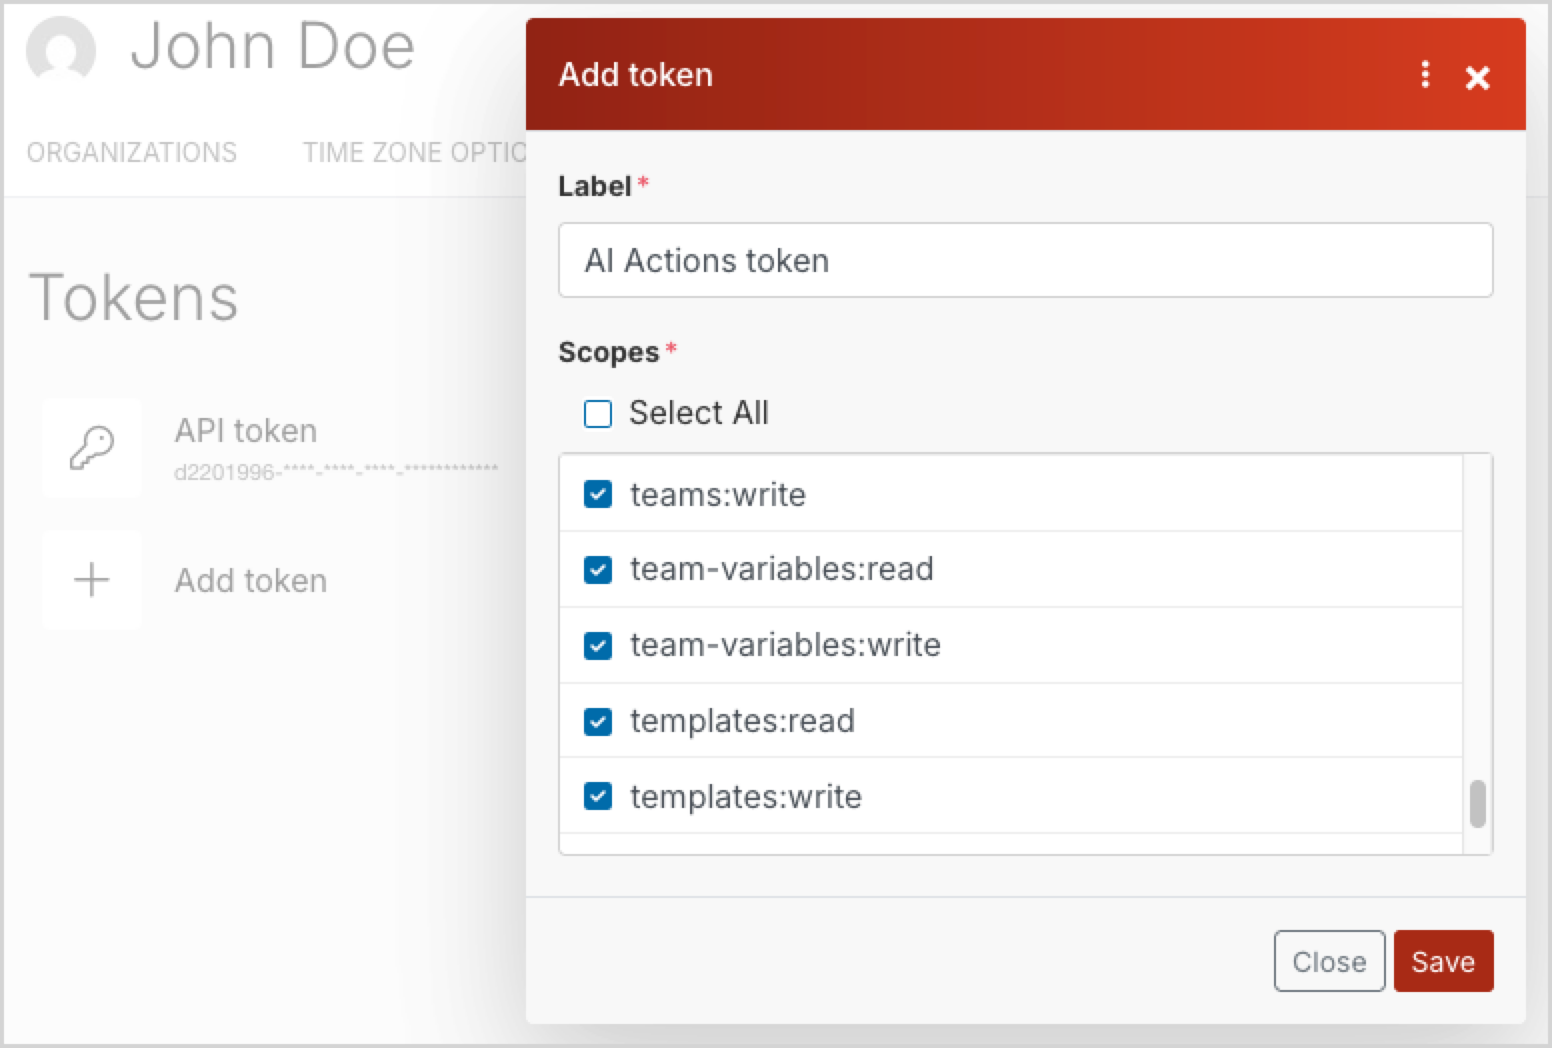
Copy the token code that appears on the tokens list, next to the label.
Set up credentials
Provide the token that you got from Ibexa Connect and the team ID in your instance's Ibexa Connect integration settings.
Initiate integration
Initiate the models provided by the handler by issuing the following command:
1 | |
For example:
1 | |
Support for multiple Ibexa Connect languages
The language attribute determines the language in which template details such as module names will be displayed in Ibexa Connect's UI.
Then, create the Ibexa AI handler custom property in Ibexa Connect to store the list of available action handlers for this integration.
You can do it by running the following command:
1 | |
For example:
1 | |
The Ibexa AI handler property attaches to a scenario to store information about the action handler associated with it.
When creating a new Ibexa Connect-based AI action, the back office of Cohesivo shows only the existing scenarios that work with selected action handler.
Customize templates
Return to the Ibexa Connect dashboard and modify the Template for connect...handler templates by defining the logic needed to process the data.
Once the templates are ready, you can build scenarios from them, either directly in Ibexa Connect or in Cohesivo's user interface.